Links
[slideshow:1]
[toc]
Project Information
- v1.0 Electronics for Artists course project: Arduino / ESP32 / DC motors / servos.
- v2.0 Physical Interaction Design course project: Pure Data / Bela board / Wekinator / WiFi dongle / speaker / DC motors / servos.
- Size: 25(H)*25(W)*25(D) cm.
Overview
The instrumentbot is built based on the EFA robot as a starting point, and then replaces the original Arduino UNO with two controller versions: ESP32 and Bela board. The programming languages are Arduino and Pure Data, respectively.
Three additional features were added to the instrumentbot: remote control via WiFi (TCP/IP), a moving eyeball controlled by two servo motors, and a speaker playing sine waves with several frequencies generated by Pure Data. These features make the robot more engaging for audiences and easier to control intuitively.
Idea
The concept is a mobile instrumentbot that moves with wheels, inspired by the uncanny creature feeling of a toy head attached to a spider-like body in the “Toy Story” animation, creating an unusual artificial monster. It plays electronic sounds while detecting changing smartphone axes by receiving OSC data from an OSC app via WiFi. This gives it a live-creature quality while enabling remote control.
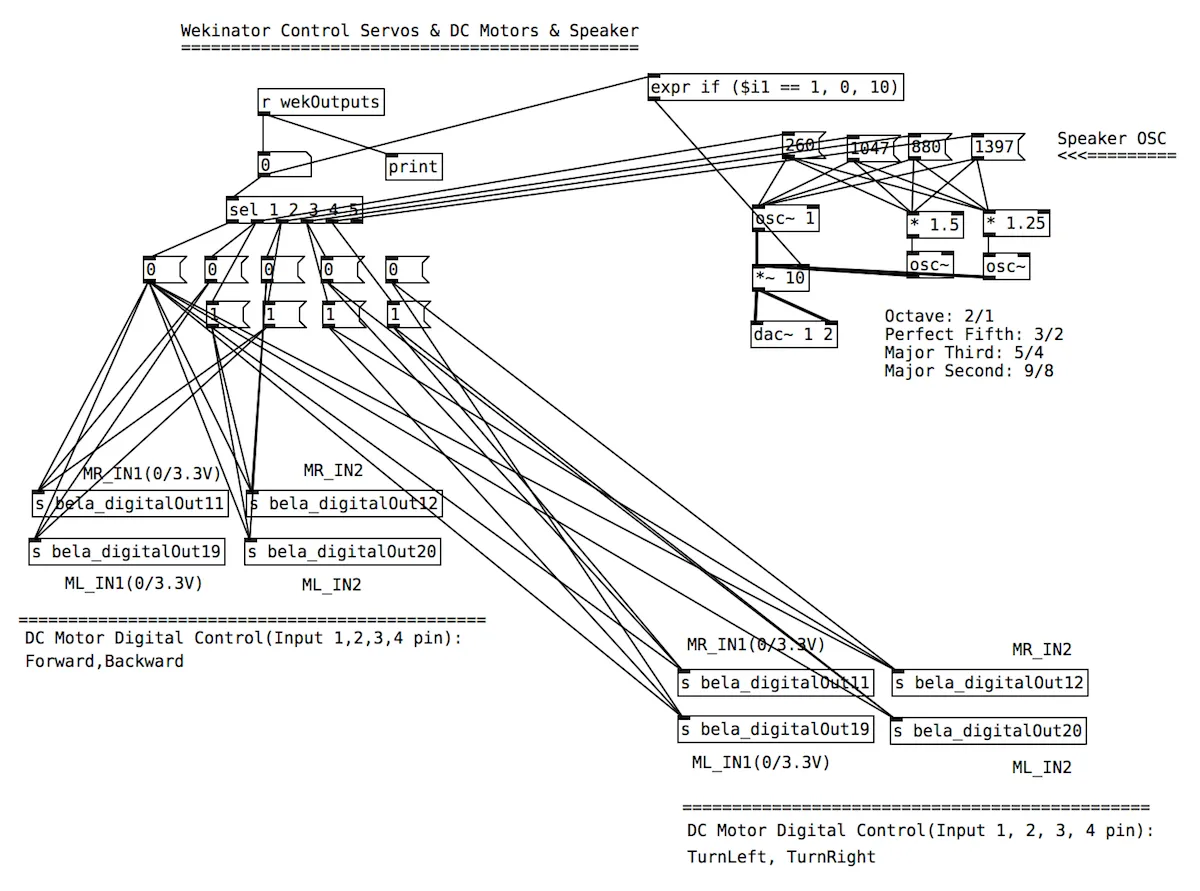
Wekinator is used as a machine learning toolkit to classify smartphone axis data, then send class results to Pure Data to control a speaker, two servos, and two DC motors on the Bela board.
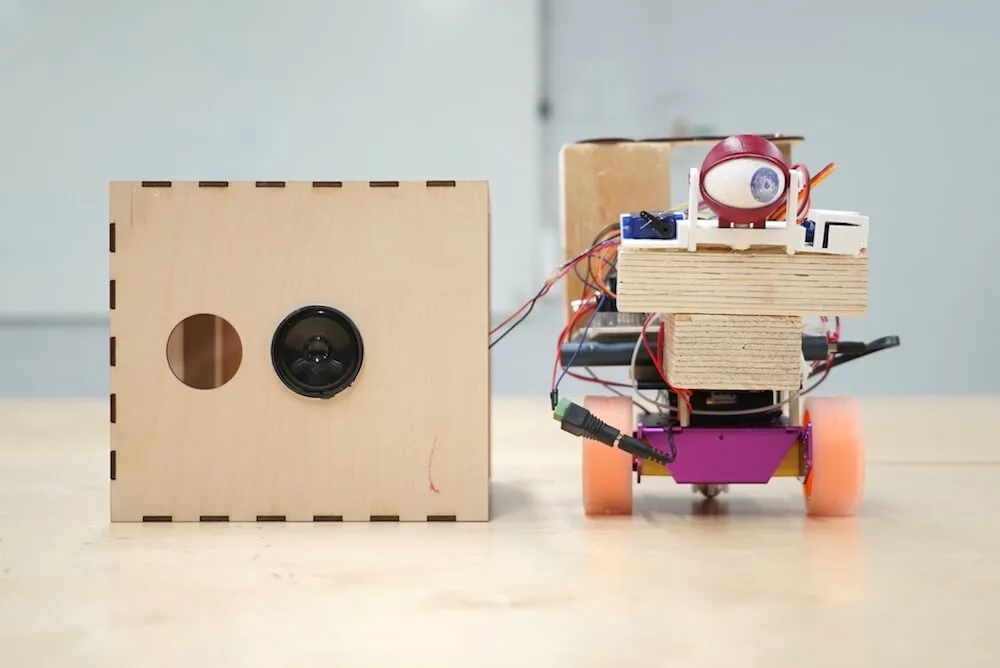
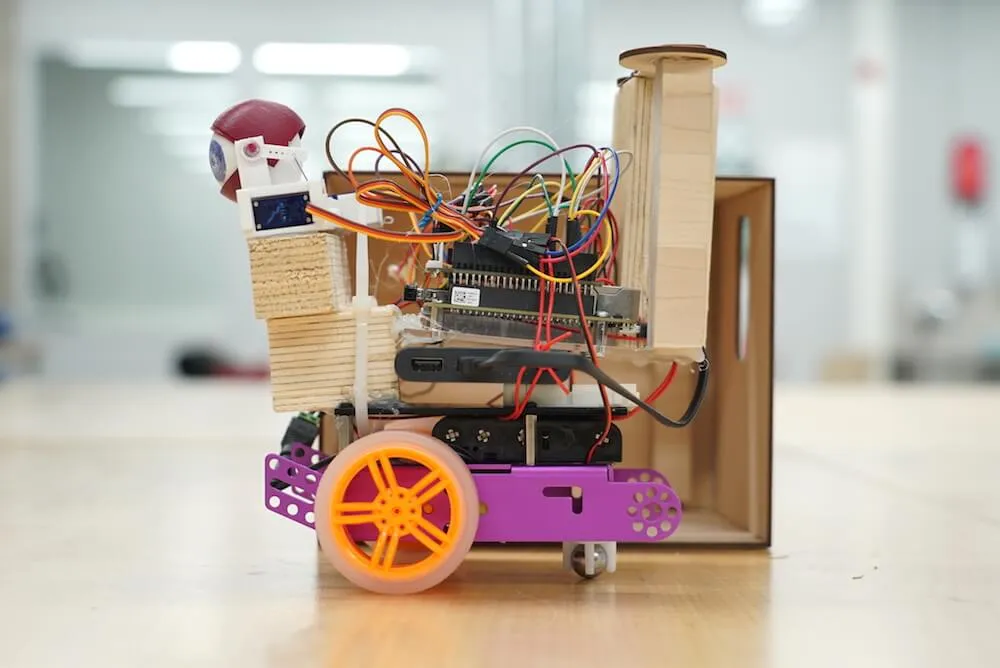
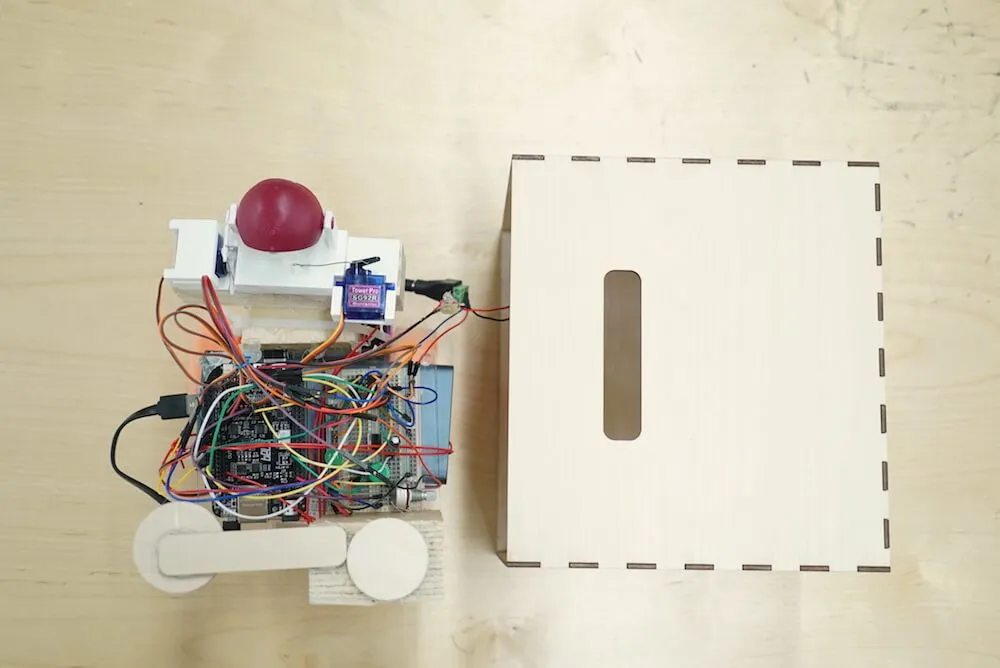
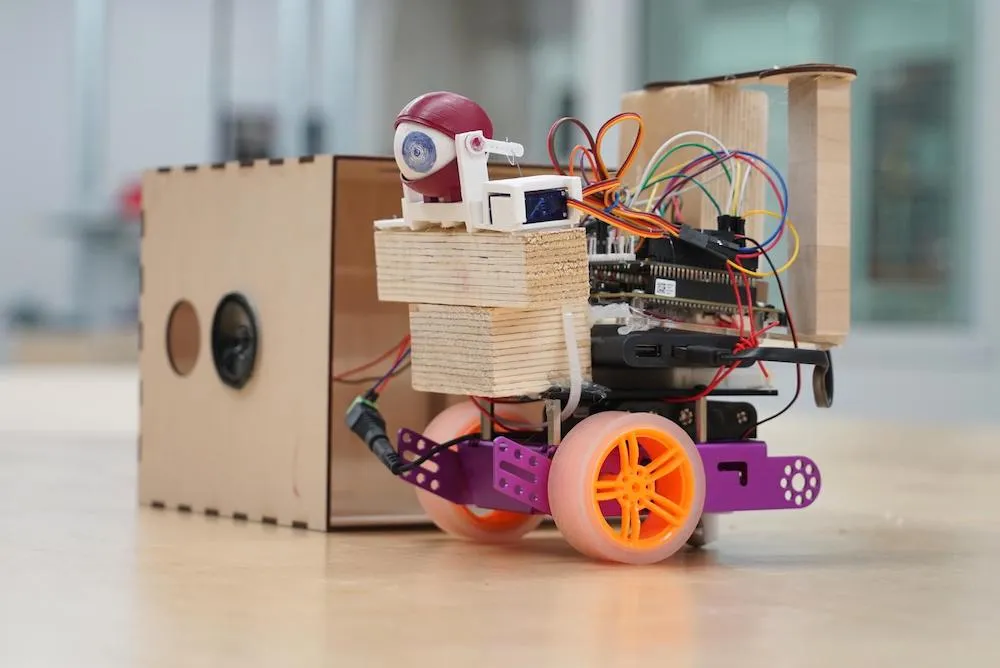

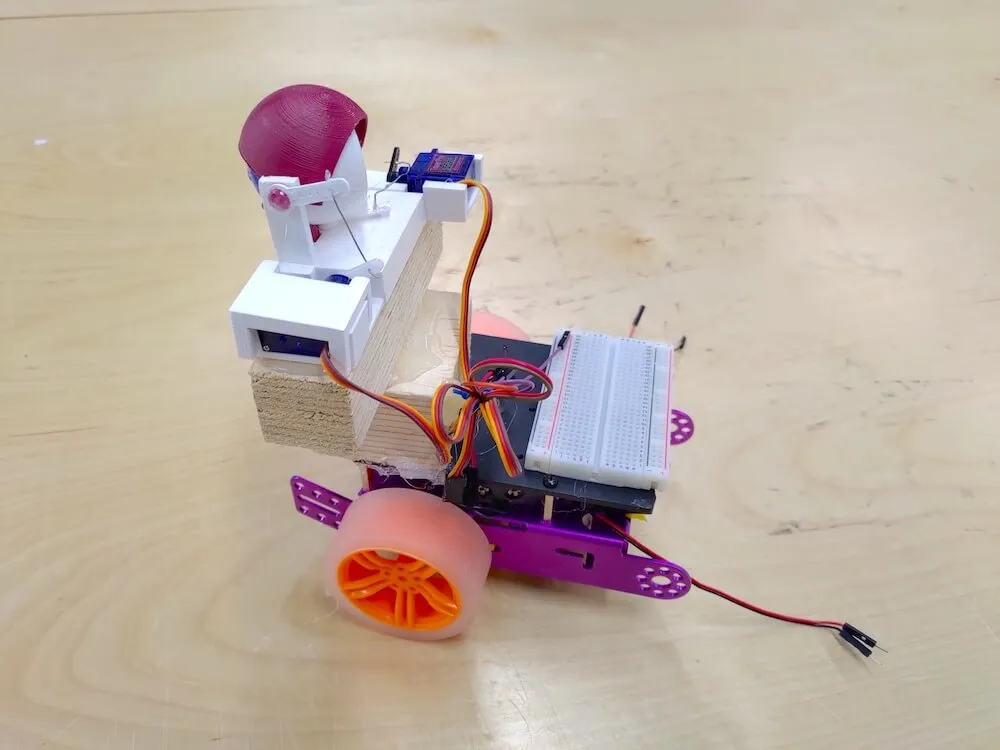
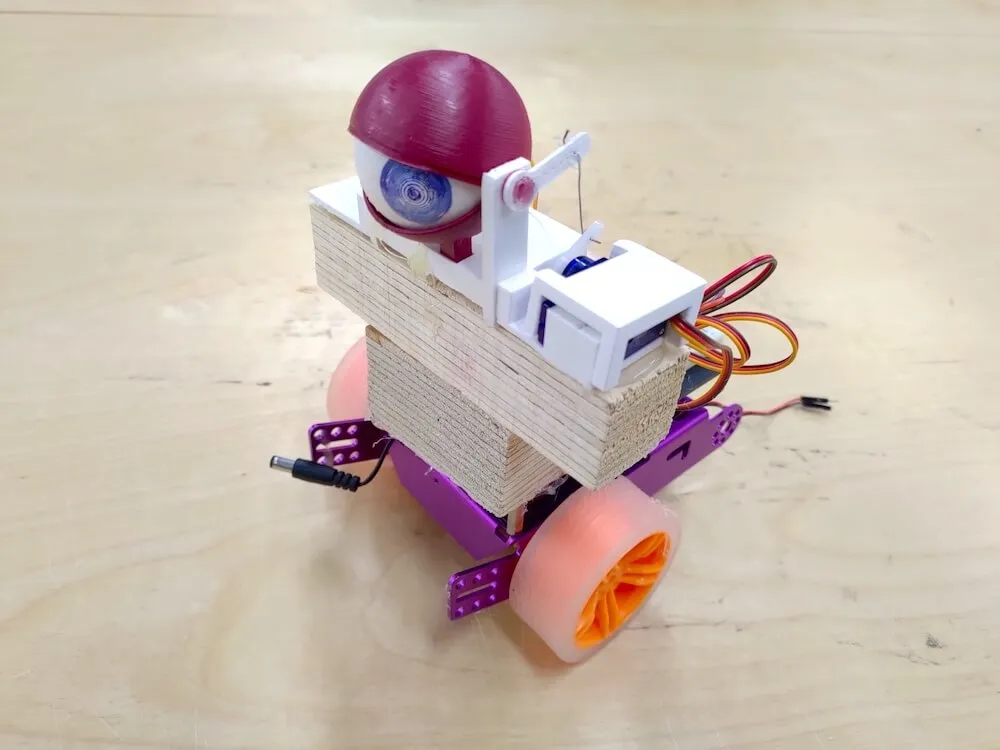
Figure 1. Images above show both inside and outside of the moving instrumentbot.
Mechanism and Construction
Theory of Motor Control
- Speed Control of DC Motor Using Pulse-Width Modulation
- Angle Control of Servo Using Pulse-Width Modulation
v1.0 Arduino (ESP32) Version
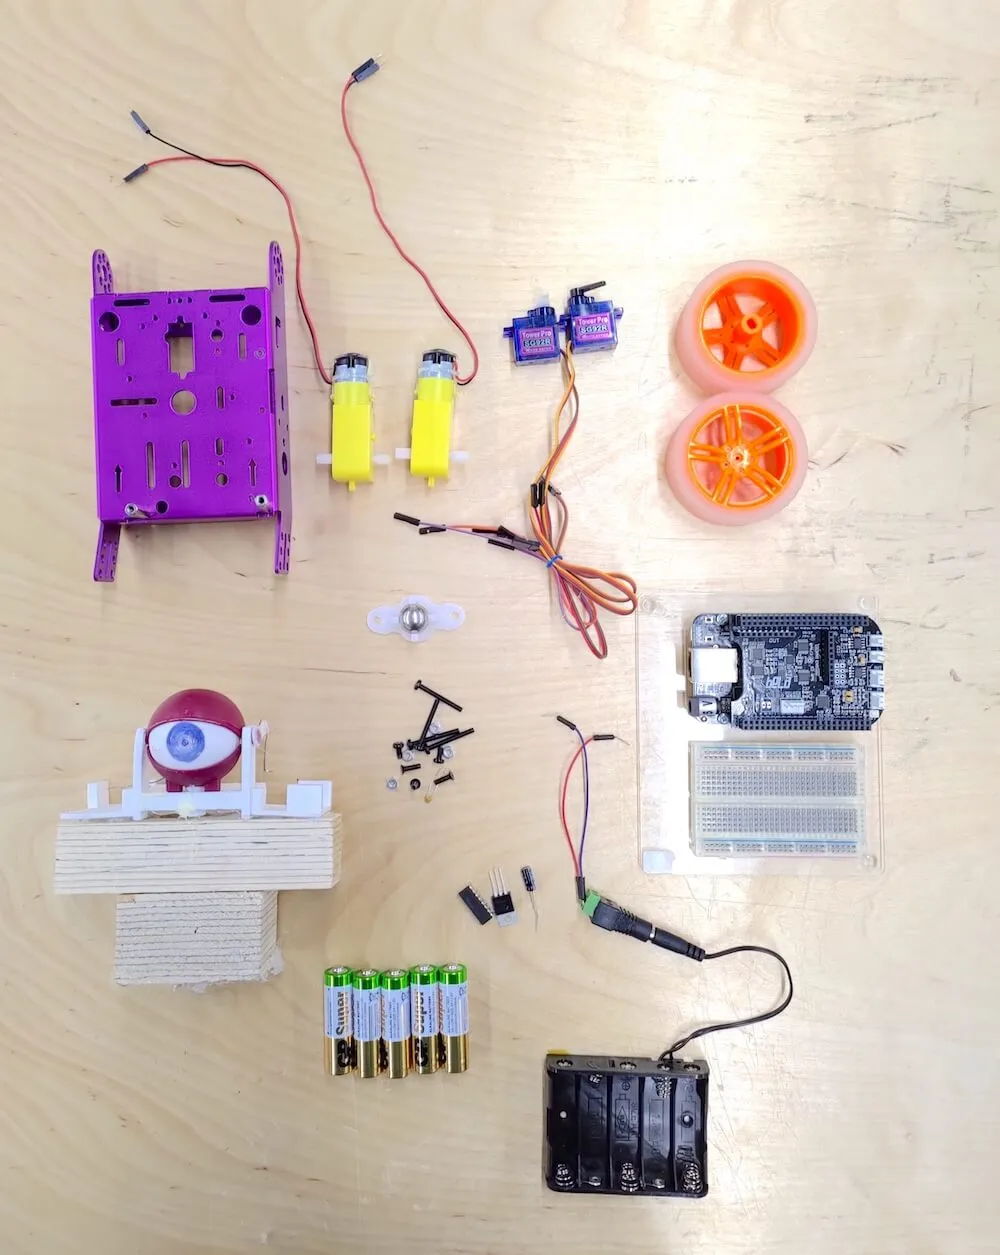
Components and Supplies
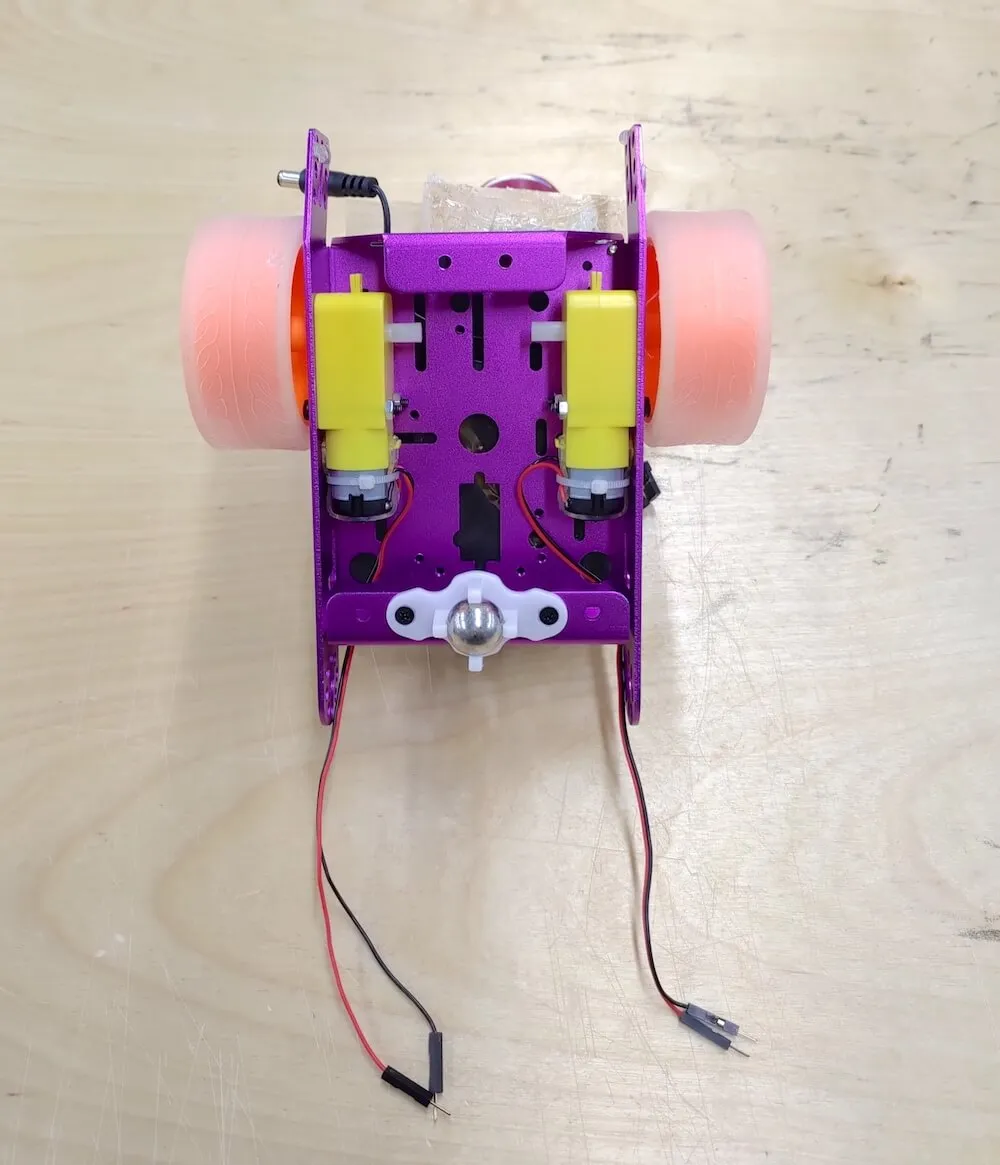
- EFA Robot Components (exclude ultrasonic and light sensor) x1
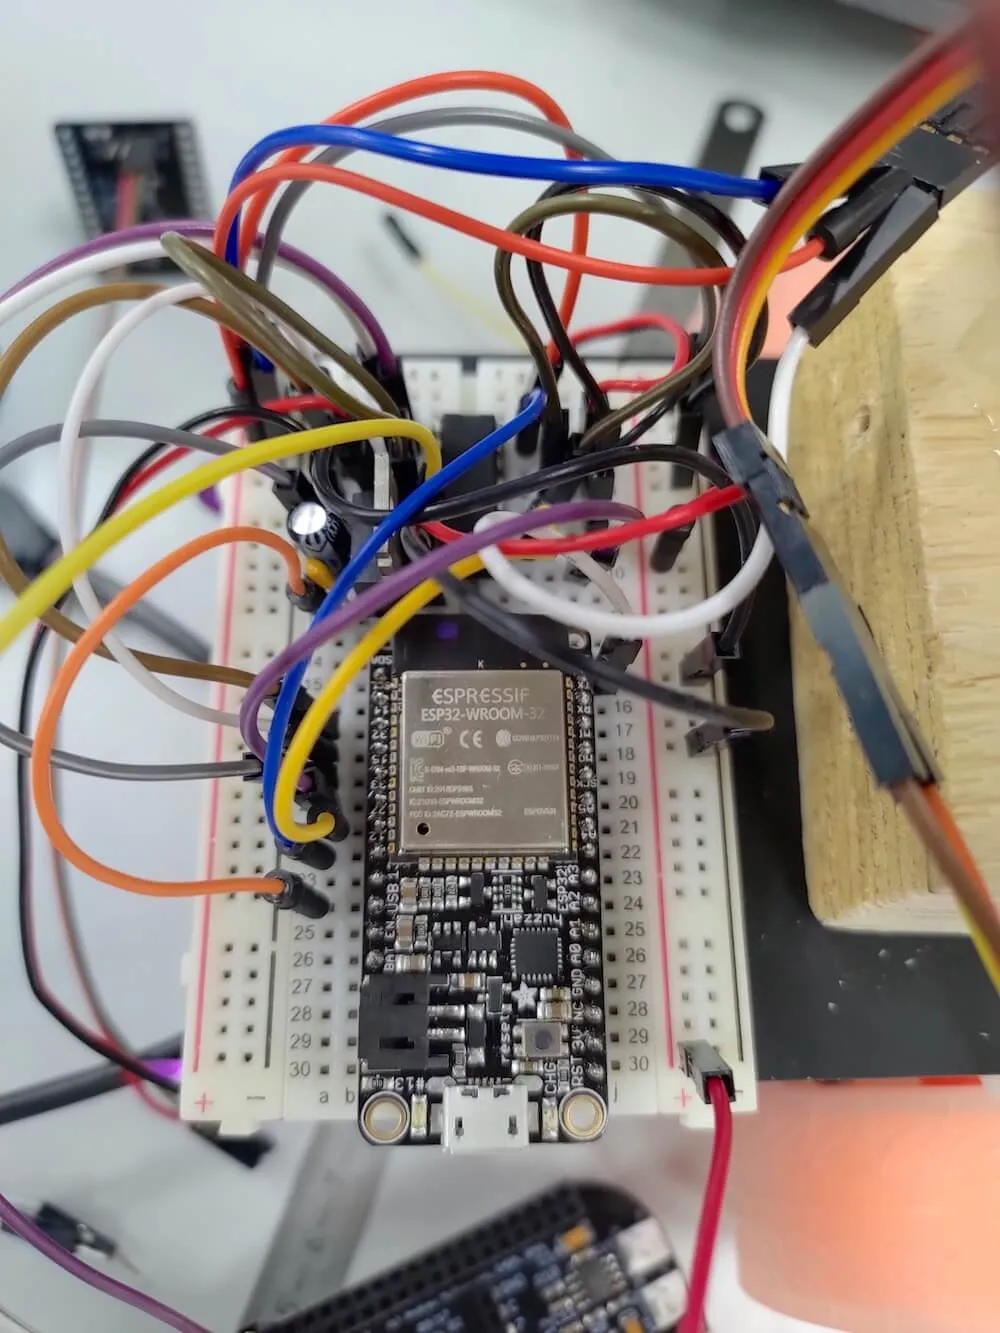
- Adafruit HUZZAH32 ESP32 Feather Board (replace Arduino UNO) x1
- 3D-Printed Eyeball Model x1
- SG90 Servo Motor x2
- Customized laser-cut wooden box x1
What Does It Do?
This instrumentbot is controlled remotely via a webpage running on a portable device under the same network.
The project combines these topics:
- Uploading a customized webpage with multiple control buttons to the robot server.
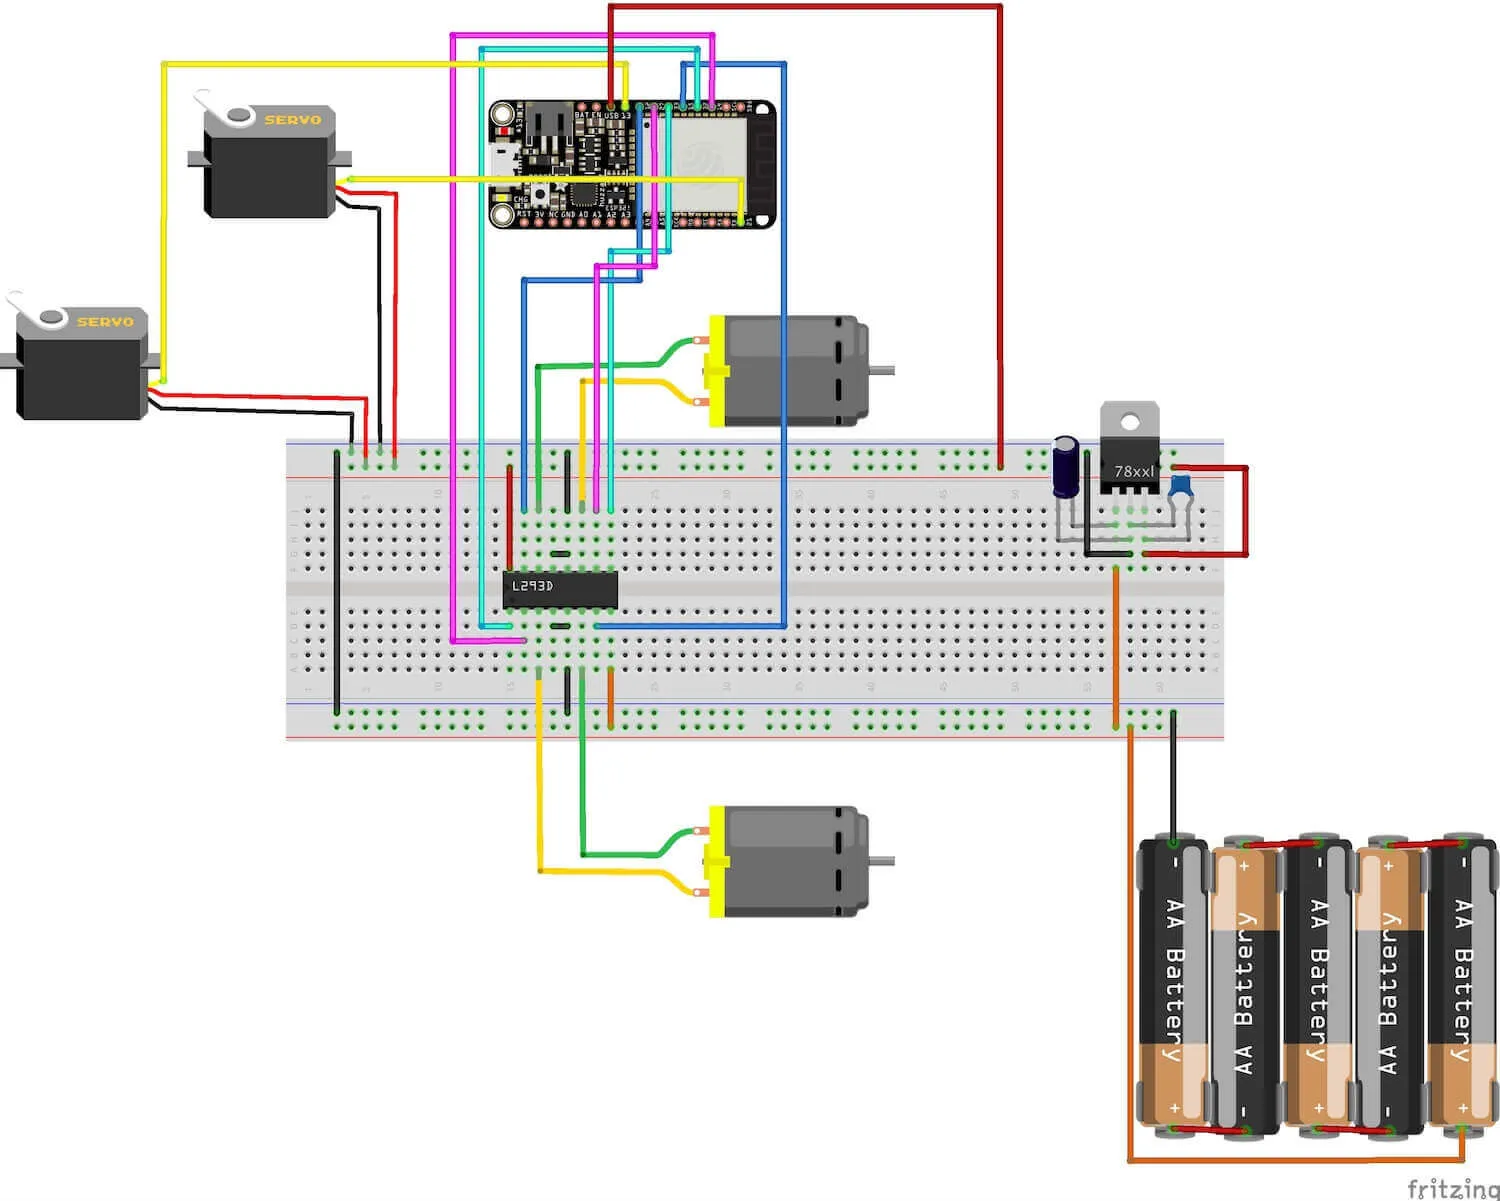
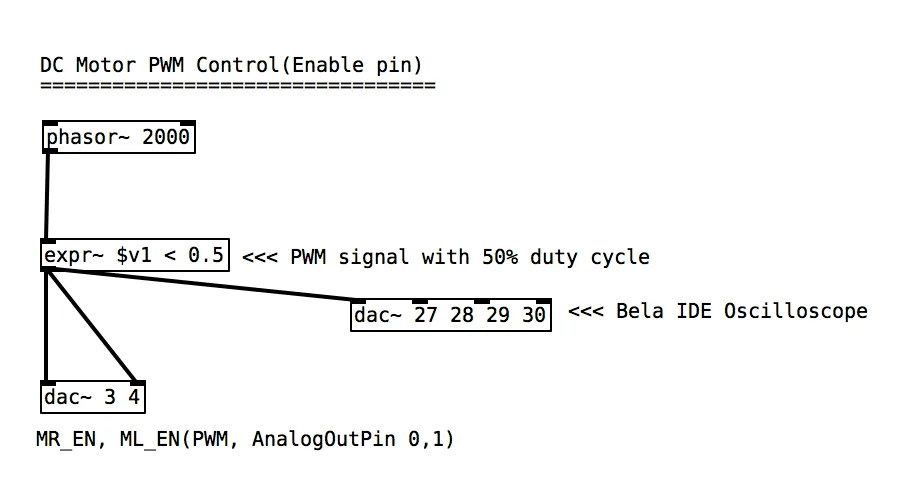
- Controlling DC motors with the L293D H-Bridge IC by outputting PWM to ENABLE pins and digital high/low values to INPUT pins.
The instrumentbot is curious about everything around it and wants to start its adventurous trip. However, it doesn’t know the correct direction to adventure and thus rely heavily on audience’s instructions to help it find out a suitable way to move.
The interaction flow:
- A control webpage is served from the robot IP and accessed by smartphones on the same SSID.
- The robot moves forward, backward, left, or right according to mobile browser commands.
- The robot rotates its eyeball (two servos) once it stops moving.
ESP32 Pin Connection
ESP32 pin map reference: ESP32 Diagram
Simple Webpage Controller
The webpage is built and uploaded to the robot server via Arduino code.
Implementation: Arduino Code
v2.0 Bela Board Version
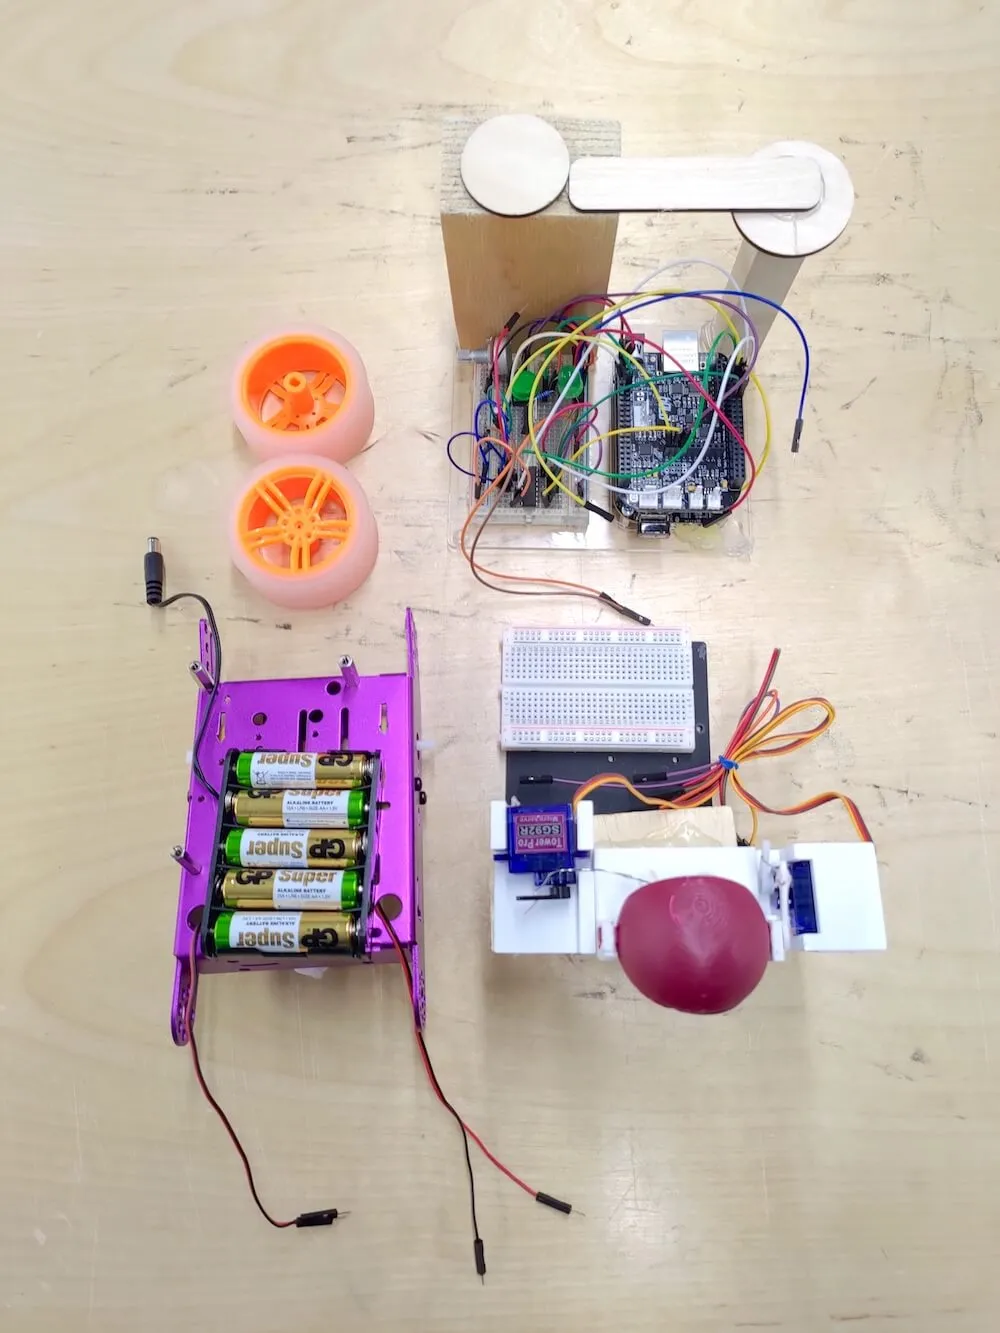
Components and Supplies
- EFA Robot Components (exclude ultrasonic and light sensor) x1
- Bela Cape Starter Kit (replace Arduino UNO) x1
- Asus USB-N10 Nano WiFi adapter x1
- 3D-Printed Eyeball Model x1
- SG90 Servo Motor x2
- 1W Speaker x1
- Customized laser-cut wooden box x1
- Power bank (optional), or use 7805 regulator to power Bela by plugging 5V into P9_06 x1
What Does It Do?
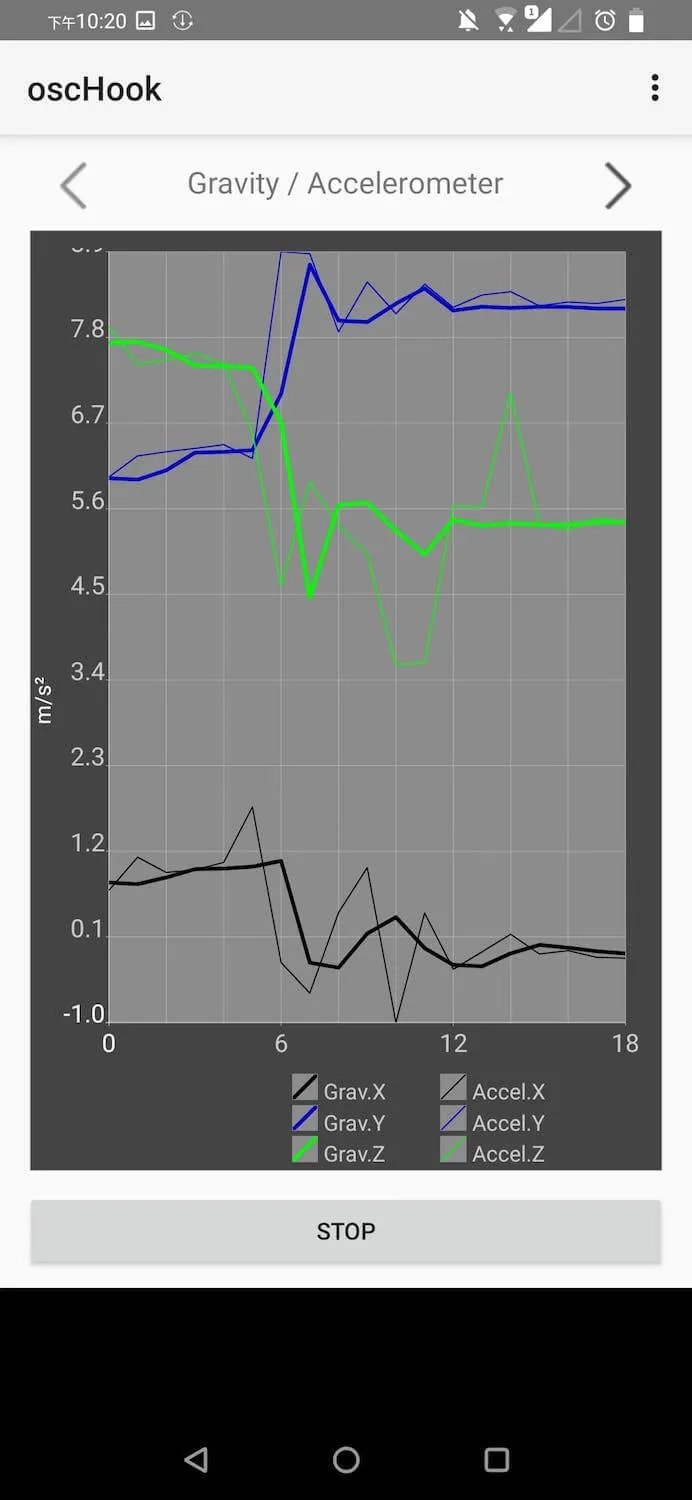
This instrumentbot is controlled remotely by smartphone accelerometer orientation on the same network. Audience can control the robot by turning the phone up, down, left, or right.
The project combines these topics:
- Setting up the WiFi function on Linux operating system, which is run by Bela board, by editing its network interface after plugging the USB WiFi dongle into the Bela board.
- Training the axis data received from the smartphone’s OSC application by Wekinator.
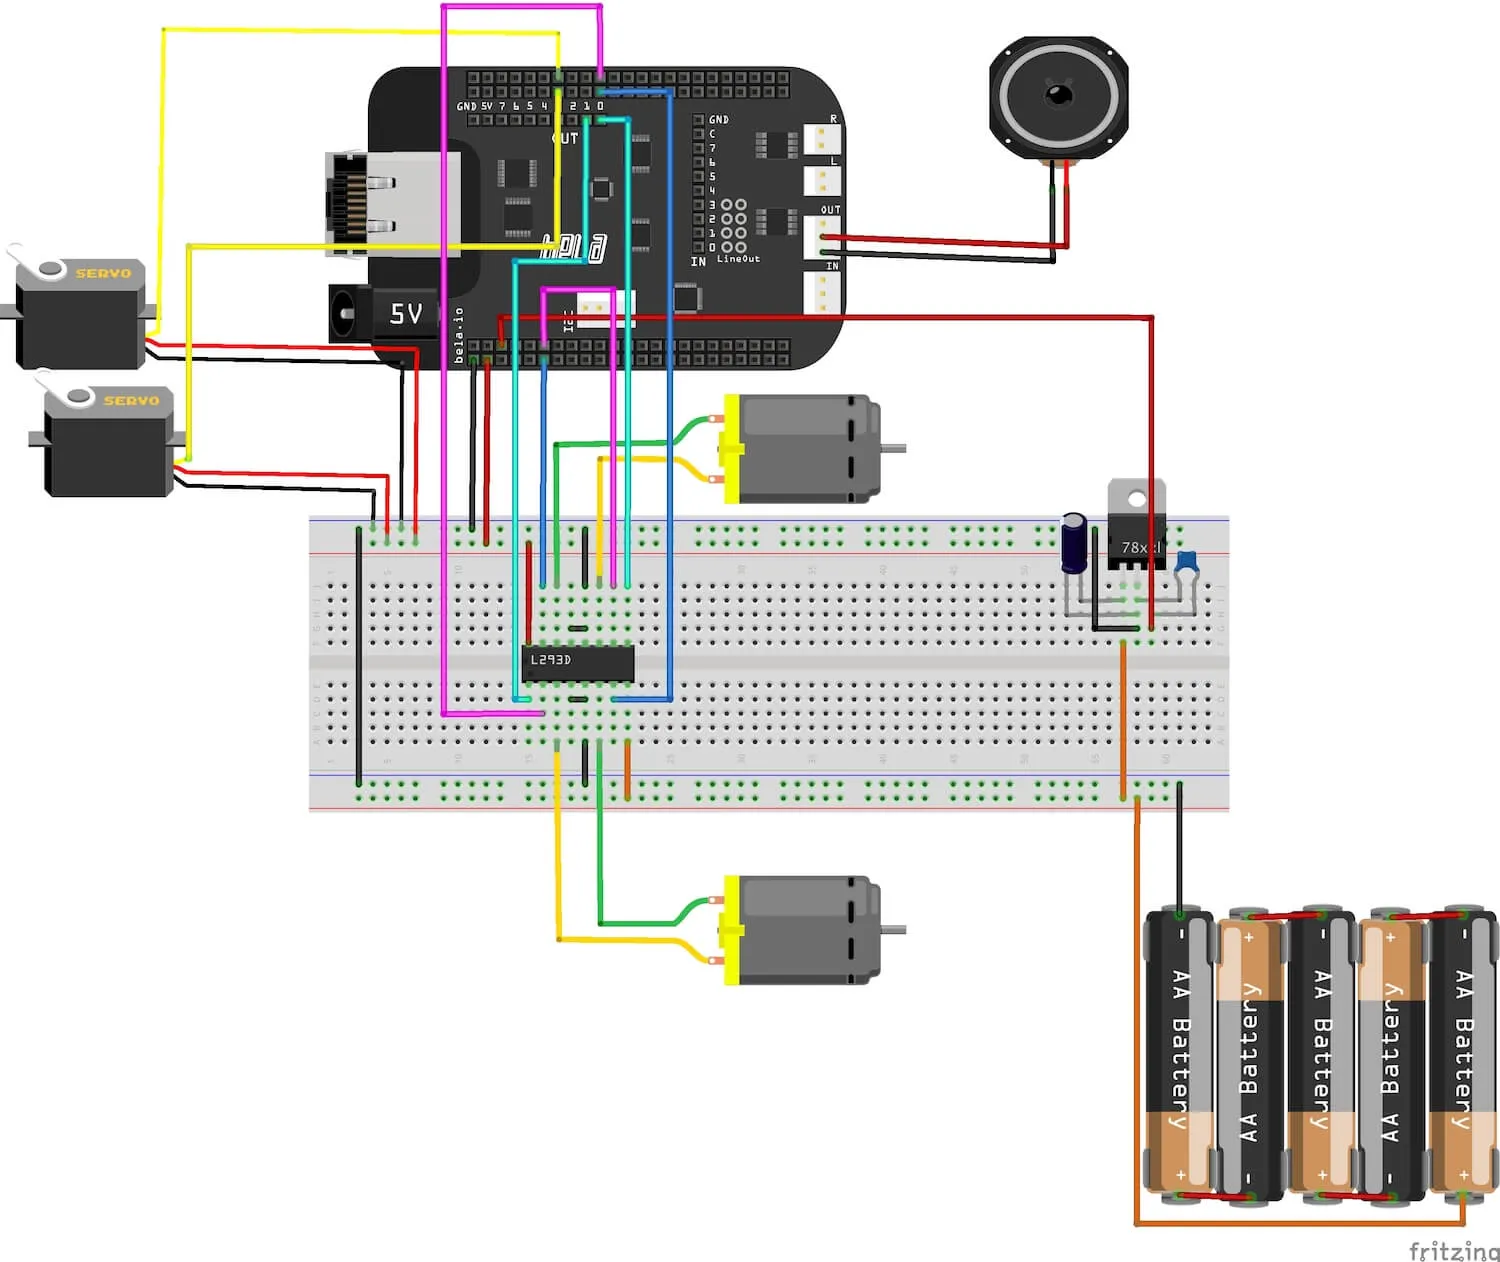
- Controlling DC Motors with the L293D H-Bridge IC by generating PWM with a specific duty cycle by Pure Data to its ENABLE pins and digital high or low value to its INPUT pins.
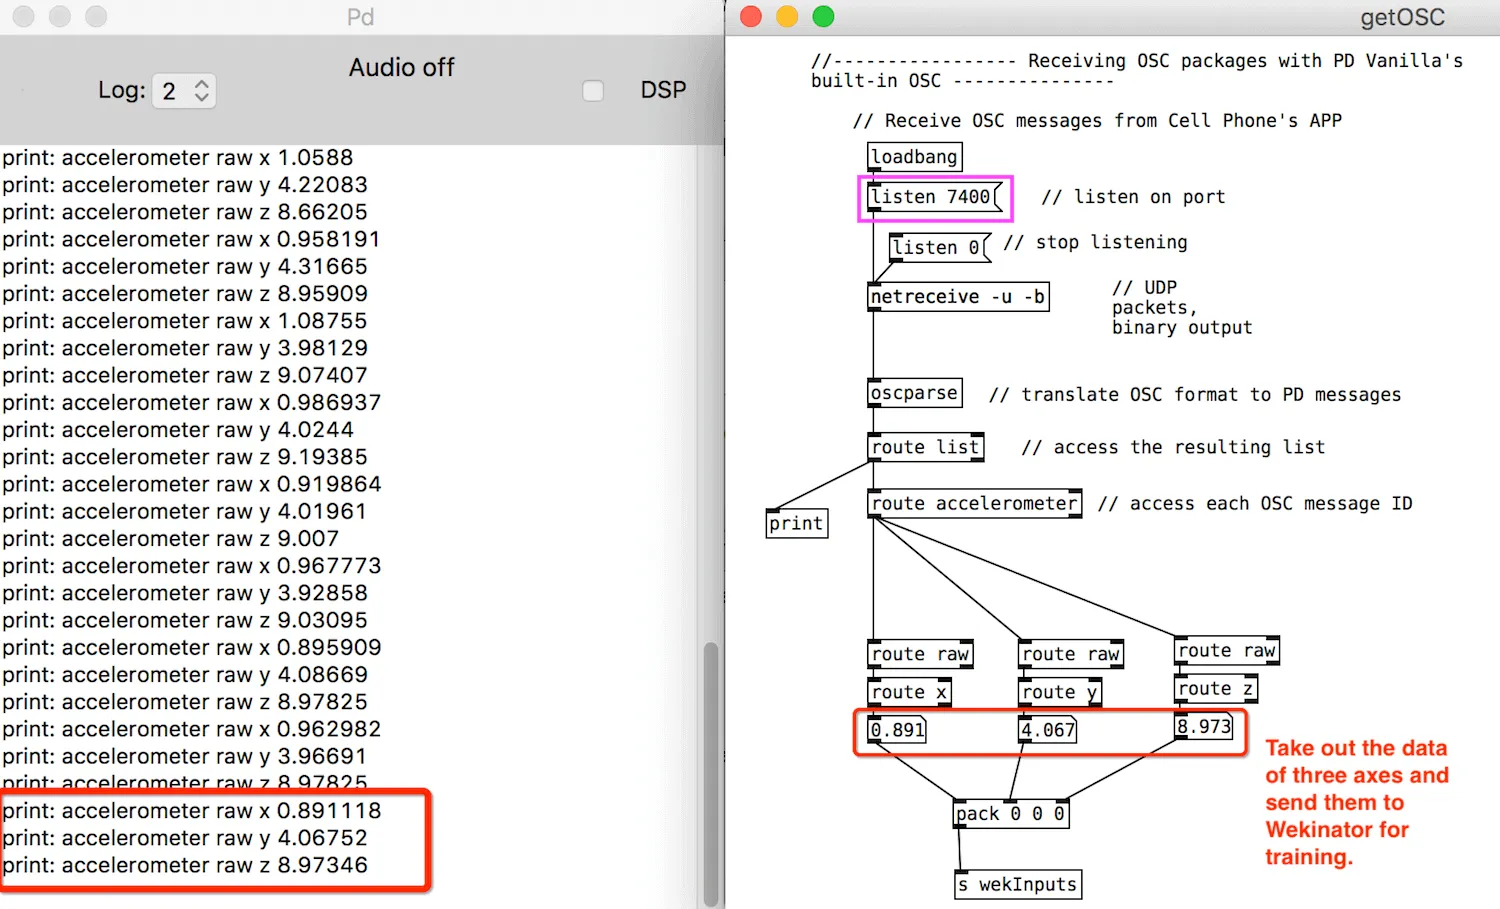
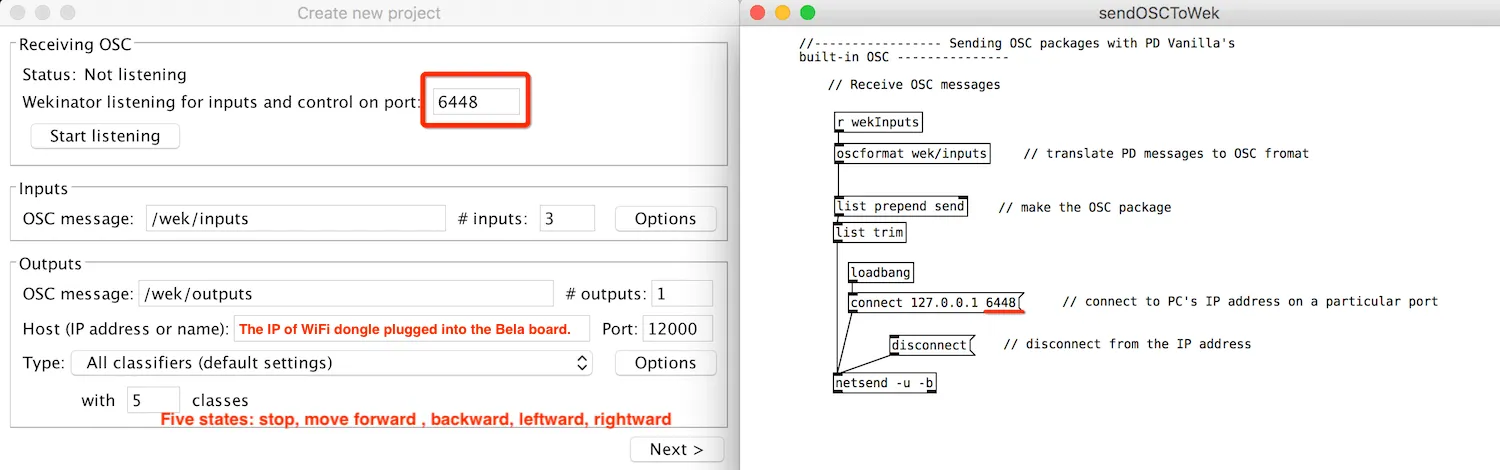
There are three Pd patches in the interaction pipeline: getOSC.pd, sendOSCToWek.pd (local), and _main.pd (on Bela).
Interaction logic:
-
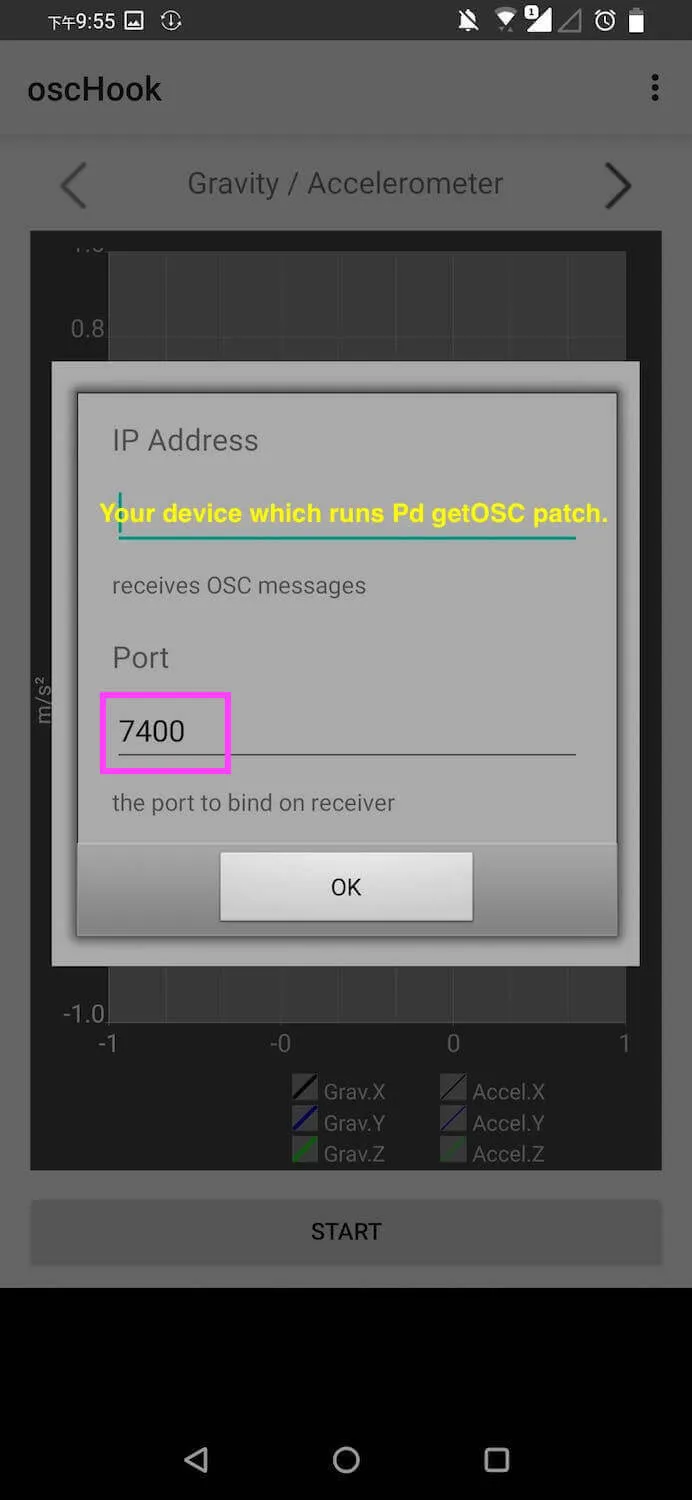
OSCHook App sends the axis data of the smartphone’s accelerator in OSC format to
getOSC.pd. -
getOSC.pdunpacks the axis data and only sends the number value tosendOSCToWek.pd. -
sendOSCToWek.pdthen sends pure number data receiving fromgetOSC.pdto Wekinator and listens to the same port(6448) as Wekinator’s. -
Wekinator outputs the trained data in the format of class(1 to 5) to
_main.pdrun by Bela board installed on the instrumentbot. -
The robot moves when it receives commands from the
_main.pdwhich value of the class data is received from Wekinator. -
Robot behaviors based on different class values:
- Phone flat: robot stays still and looks around.
- Phone upside down: robot moves forward and stops looking around.
- Phone vertical against table: robot moves backward.
- Phone tilted right: robot turns right.
- Phone tilted left: robot turns left.
Bela Board Pin Connection
Bela reference: Bela Cape Diagram
Implementation: Pd OSC Communication and Machine Learning Toolkit (Wekinator)

Step 0. Connecting Bela to WiFi
Tutorial: Connecting Bela to WiFi
Edit Bela’s network interface following the tutorial after plugging the USB WiFi dongle into the Bela board.
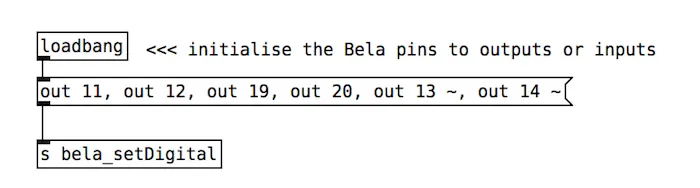
Step 1. Initialize Bela pin mode
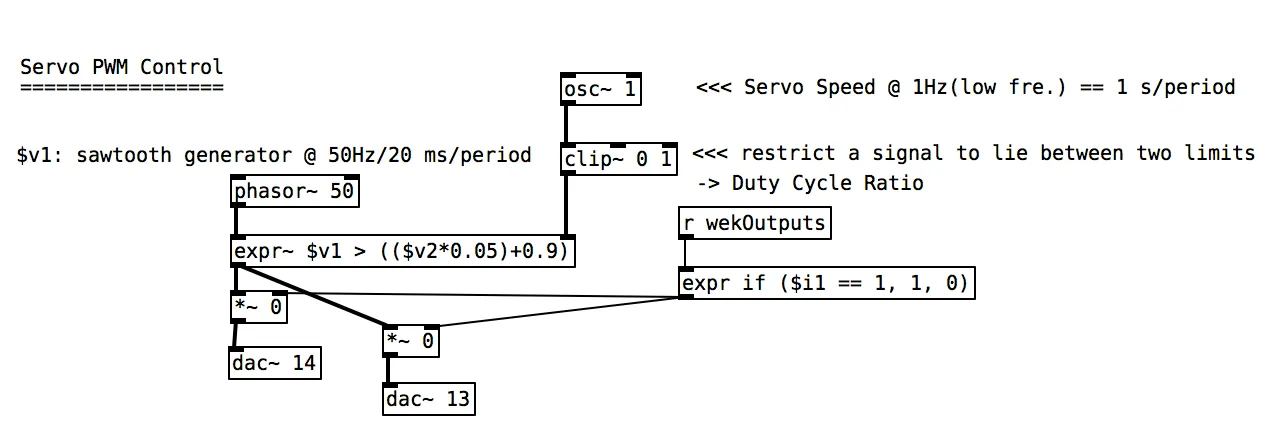
Step 2. Generate PWM for two servos
Generate PWM and output it to control the angle of two servos.
Step 3. Generate PWM for L293D ENABLE pins
Generate PWM and output it to L293D’s ENABLE pins to control the speed of DC motors.
Step 4. Send smartphone OSC data to getOSC Pd patch
Send accelerator data in OSC format from smartphone’s OSC App to PC which runs getOSC.pd.
Step 5. Reorganize axis data as pure floats
PC receives axes’ data from the smartphone and reorganizes it into pure floating-point values.
Step 6. Send pure axis data to Wekinator
Wekinator gets pure axis data from sendOSCToWek.pd running on the same port.
Step 7. Use classes to drive motors and speaker frequency
The values of L293D’s four INPUT pins are set high or low according to the type of output classes trained by Wekinator. The frequency played by the speaker is also controlled by it.